585A/RM585A Mod Info
Contributed by Stan Griffiths
If your Tek 585A or RM585A has the following serial no., you may be
interested in the following mod info:
585A: Prior to S/N 9250
Heerenveen-Built 585A: Prior to S/N 700400
RM585A: Prior to S/N 1020
Description
To protect your vertical output tubes, (V1274 and V1284) your regulator, (V737B) and your relay, (K601-4) the contact location of the relay is changed from the junction of C700 and the plate of V677B and 737A to the junction of D702A and B and D672 A and C.
Installation
- Locate the gray-red-brown wire on terminal 2 of K601. See Fig.1.
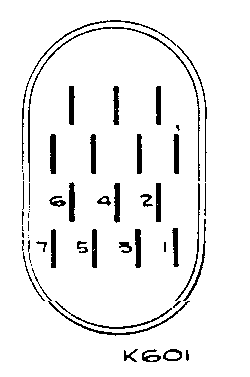
Fig. 1. - Remove the two gray-red-brown wires from CSJ-11 on the sweep chassis.
See Fig.2.
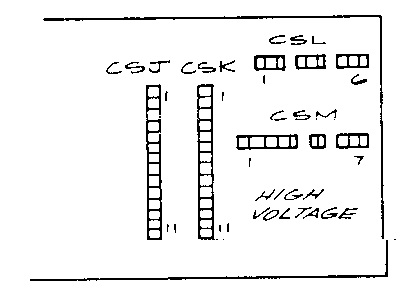
Fig. 2.
One of these two wires is the other end of the wire referred to in step 1.
Using an ohmmeter, determine which wire connects to K 601-2. Unsolder it from the relay (terminal 2) and cut it off on both ends close to the cable, as it will not be reused.
Resolder the other gray-red-brown wire back to CSJ-11 (+325 unreg) - Remove the bare wire that connects CSA-8 to CSA-12 on the rectifier
bracket. See Fig. 3.
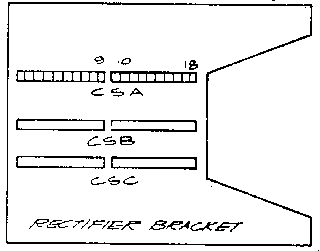
Fig. 3.
- Using the same technique as in step 2, locate the gray-red-red wire
that connects K601-1 to CSA-9 on the rectifier bracket and solder the ceramic
strip end of this wire to CSA-8.
Resolder the other gray-red-red wire back to CSA-9. - Install a gray-red-brown wire from CSA-12 on the rectifier bracket to terminal 2 of K601.
- Install a bare wire from CSD-7 to CSD-8 on the power chassis. See fig.
4.
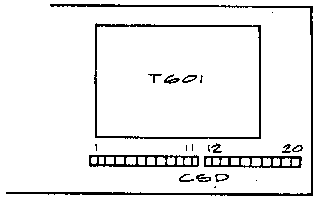
Fig. 4.
- IMPORTANT: Check the relay for welded contacts. Separate them and burnish.
- This completes installation. Update the circuit diagram in your manual
according to fig.5.
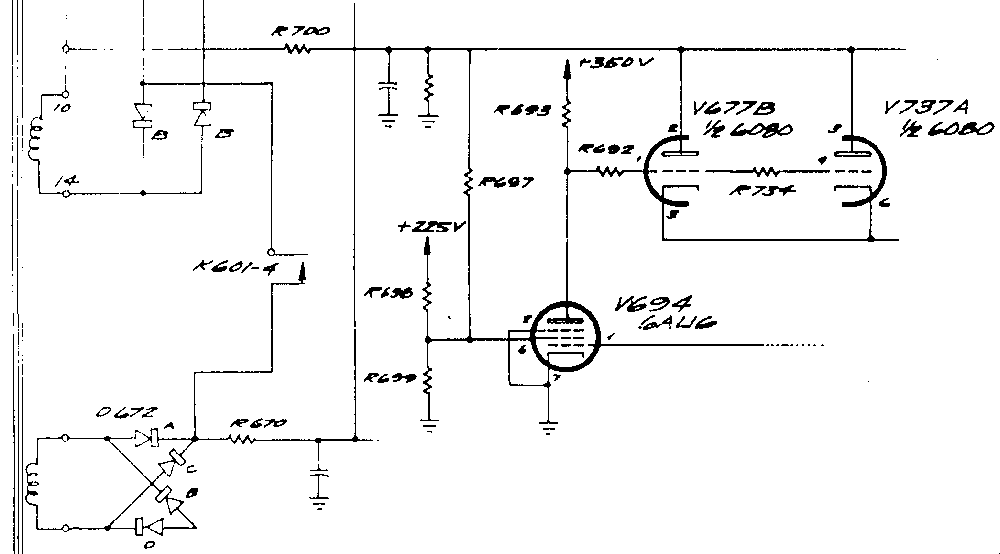
Fig. 5.